HTML5: Remotely vibrate a phone with morse code using web sockets and the vibrate API.
In my last couple of blog posts I showed you can use a couple of the new HTML5 related APIs (webrtc, web workers, device orientation) directly from your browser. A couple of days ago I ran into the W3C Vibration API, which reached “Candidate Recommendation” status last week (8th of May). This API allows you, as the name might suggest (unless you have a very dirty mind), access to the vibrate functionality of your device. Or as the specification says it:
“This specification defines an API that provides access to the vibration mechanism of the hosting device. Vibration is a form of tactile feedback.”
This API in itself is very simple:
interface Vibration {
    void vibrate (unsigned long time);
    void vibrate (unsigned long[] pattern);
};
So basically to vibrate your device for 10 seconds do this:
navigator.vibrate(10000);
If you want to vibrate in a specific pattern, you can supply the vibrate method with an array of values. Where each even entry (starts with 0) vibrates the device and each odd entry signals a pauze:
navigator.vibrate([1000, 500, 2000]);
Very easy to use as you can see. Now lets see if we can create something interesting with this. For this tutorial we’ll create a simple HTML5 application (the receiver) that can receive morse code encoded messages through a websocket and ‘play’ these messages using a device’s vibration function. We’ll also create a simple webpage (the sender) where you can enter the messages to be sent to the receiver. Note that I’ve tested this with mozilla latest mobile browser, I couldn’t find whether any of the other browser already support this API.
The following video shows the application we’ll be building (turn up the volume, since my phone doesn’t make much noise…) :
In this video you can see that we use one browser (my tablet) to send messages. These messages are played back on the second device (my mobile phone) which runs the site in a browser.
Vibrate when a morse code message is received
The first thing we need to do is vibrate the device whenever a morse code message is received. Almost everybody knows what morse code is about. With morse code you can send words encoded using a set of short (dot) and longer (dash) signals. The best known one is SOS, which encodes to “··· — ···”. The following overview from wikipedia shows how this works in more detail:

So what we need to do is define the type of message we receive and based on that message we vibrate the device. Lets first look at the very simple message format we’ve defined. This message reads “HTML5 RULES”:
var morsecode=".... - -- .-.. .....|.-. ..- .-.. . ..."
| We seperate each letter using an empty space (“ “) character and seperate each word with the pipe (“ | ”) character. Looking back at the figure from wikipedia we can now convert this to a series of vibrations for our device. |
| Code | Duration |
|---|---|
| . | Vibrate for 1T, after each . we also pause for 1T between parts of letters |
| - | Vibrate for 3T, after each - we also pause for 1T between parts of letters |
| " " | Signifies a pause of 3T |
| | | Signifies a pause of 7T |
By playing around with the value of T, we can get a good interval that can be easily detected by the person receiving the morse message. I’ve noticed that working with a value of 250ms to 500ms works ok. Lets convert this to javascript.
$(document).ready(function() {
    addListeners();
});

// time per tick is 200 ms
var T = 200;

function addListeners() {
    $("#vibrate").click(function() {
        var morsecode=".... - -- .-.. .....|.-. ..- .-.. . ...";
        var toPlay = playMorseCode(morsecode);
        navigator.mozVibrate(toPlay);
    });
}

function playMorseCode(code) {

    var arrayToPlay = [];

    for(i=0; i<code.length ; i++) {
        var char = code.charAt(i);
        // we first check if the code we received is a "."
        if (char == '.') {
            // add vibrate of 1T
            arrayToPlay.push(T);
        } else if (char == '-') {
            // add vibrate of 3T
            arrayToPlay.push(3*T);
        } else if (char == ' ') {
            // add pause of 3T
            arrayToPlay.push(3*T);
        } else if (char == '|') {
            arrayToPlay.push(7*T);
        }

        // we might need to add a spacer if the next character is either a "." or a "-"
        // and the current char is either a "." or a "-"
        if (((i + 1) < code.length)
            && (code.charAt(i) == "." || code.charAt(i) == "-")
            && (code.charAt(i+1) == "." || code.charAt(i+1) == "-")) {
            arrayToPlay.push(T);
        }
    }

    return arrayToPlay;
}
The code above converts the string in the format we specified into an array we can pass to the vibrate function. In this example I’ve bound the function to a simple button to make it easier to test the vibrate functionality. I’ve used the following HTML for testing:
<html>
<head>
    <script type="text/javascript" src="./lib/jquery-1.7.1.3.js"></script>
    <script type="text/javascript" src="./js/vibration.js"></script>
    <title>Morse receiver</title>
</head>
<body>
    <button id="vibrate">Test Vibrate</button>
</body>
</html>
Can’t get any easier than that. When you click the button on a device that support vibration in a browser that support this API (I’ve tested with the Firefox Mobile Beta browser on Android).
That handles the morse code to vibrations part. Further down in the article we’ll change this code a bit to work with websockets, but for a quick demo you can use this code. Next we’ll look at how we can connect this webapp to another one using websockets.
Use Scala and Play's websocket support for communication
We need to setup a channel between the morse code receiver and the morse code sender. For this we’ll create two websockets that can be used from HTML5 to connect to. For this example I’ve used the Play Framework 2.0 together with scala. First define the routes:
GET     /sender              controllers.Application.morsesender
GET     /receiver            controllers.Application.morsereceiver
And next define the actions that handle the websocket requests:
  // keeps track of the last receiver
  var receiverOut : PushEnumerator[String] = null;

  /**
   * Receiver doesn't do much. Just register the receiverOut channel
   * so that it can be used by the sender.
   */
  def morsereceiver = WebSocket.using[String] { request =>
   receiverOut = Enumerator.imperative[String]();
   val in = Iteratee.foreach[String](content => {})
   (in, receiverOut)
  }


  /**
   * The sender just pushes the received content directly to
   * the output.
   */
  def morsesender = WebSocket.using[String] { request =>
    val out = Enumerator.imperative[String]();
    val in = Iteratee.foreach[String](content => {
      if (receiverOut != null) {
         receiverOut.push(content);
      }
    })

    (in, out)
  }
All very trivial (more info on websockets and Play can be found in one of my previous articles here). With these routes and these actions all requests from the morse sender are immediately sent to the morse receiver. Now that we’ve got websockets that we can use to communicate between the sender and the receiver, lets look at the sender.
Morse code sender
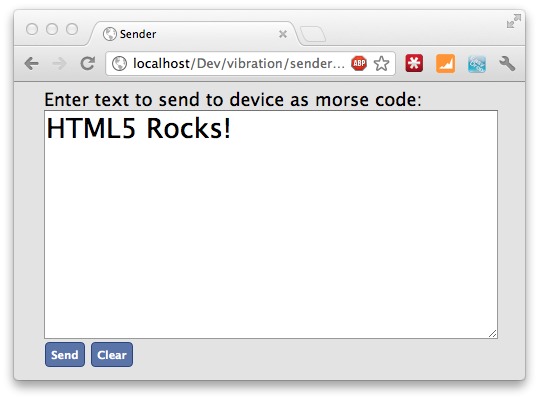
The sender should just show a simple text area where we can type in plain text. After we click on a button this text is converted to the morse code format we defined, and is sent to a websocket. The server will pass this on to the receiver which will vibrate the phone. The sender we create looks like this:
The complete javascript for this is shown here:
// variable that holds ws connection
var ws = null;

// define how morse code is created
morjs.defineMode('smartjava', [
    '.',
    '-',
    '',
    ' ',
    '|'
]);

$(document).ready(function() {
    setupMorseSender();
    addListeners();
});


function setupMorseSender() {
    ws = new WebSocket("ws://10.0.0.157:9000/sender");
    ws.onopen = function () {
        console.log("Openened connection to websocket");
    }
}

function addListeners() {
    $("#send").click(function() {
        var toSend = $("#morse").val();
        var encoded = morjs.encode({message: toSend , mode: 'smartjava'});
        ws.send(encoded);
    });

    $("#clear").click(function() {
        $("#morse").val("");
    });
}
As you can see in the code we convert the input text to morse code from javascript. For this I use the mor.js library. This is a javascript libary that allows you to convert text to morse code and also allows you to define the way this morse code is represented. Since I want to represent morse code in this format: “…. - – .-.. …..|.-. ..- .-.. . …” we need to supply the mor.js library with a formatter. This is done in the previous code by the call to the morjs.defineMode() function. The rest of the javascript is very straighforward. We use jquery to attach functionality to the two buttons. Once the ‘send’ button is clicked we create the morse code from the entered text and send it as a text message using a websocket that is connected to the simple play/scala server running at “ws://10.0.0.157:9000/sender”. That wraps up the sender configuration. The final step we need to take is change our example vibrate code to listen to a websocket and once we receive a message output that message through the device’s vibrate function.
Morse code receiver
We’ve already seen most of the code for the receiver. In this part I’ll only show how to connect the receiver to the websocket and invoke the vibrate function when a message arrives. The code that handles websockets is shown here:
function setupMorseReceiver() {
    var ws = new WebSocket("ws://10.0.0.157:9000/receiver");
    ws.onopen = function () {
        ws.send("message sent");
    }
    ws.onmessage = function (msg) {
        ws.send("msg received:" + msg);
        navigator.mozVibrate(playMorseCode(msg.data));
    }
}
Couldn’t be much easier! We connect to the websocket running at “ws://10.0.0.157:9000/sender”, and when we receive a message we directly pass it to the playMorseCode() function and our devices stats vibrating the supplied morse code pattern. And that’s all. As you can see in the video at the beginning of this article we can now send morse encoded messages from one web application to another where they are played back using the vibrate function of the device.