Render 3D Star Wars: The Force Awakens models in Blender and Three.js
Recently video copilot released a free set of high-definition professional grade 3D models (which you can download for yourself from here). This model pack, which is over 400MB big) contains highly detailed model with a number of very high-quality textures. In this short article, I'll show you the workflow of converting these models into a format more easy to use in Three.js, and show you how you can render these in your browser. If your're impatient you can view the result here: http://www.smartjava.org/examples/threejs-starwars/src/html/
In this short article we'll take the following steps:
- Use blender to explore the provided materials and textures.
- Resize and convert the texture files to a more manageable format.
- Shrink the model.
- Use Three.js to render the final model.
Using Blender
I'm using Blender for the conversion and some testing, but you can use other tools as well. An advantage, though, of using Blender together with Three.js, is that you can use the Three.js Blender plugin, to export models in a format easily readable by Three.js. In this case, however, we'll just use the obj format, which is also supported by three.js.
Once you've downloaded the models, extract them somewhere and startup Blender. Remove the standard cube in the middle and use file->Import
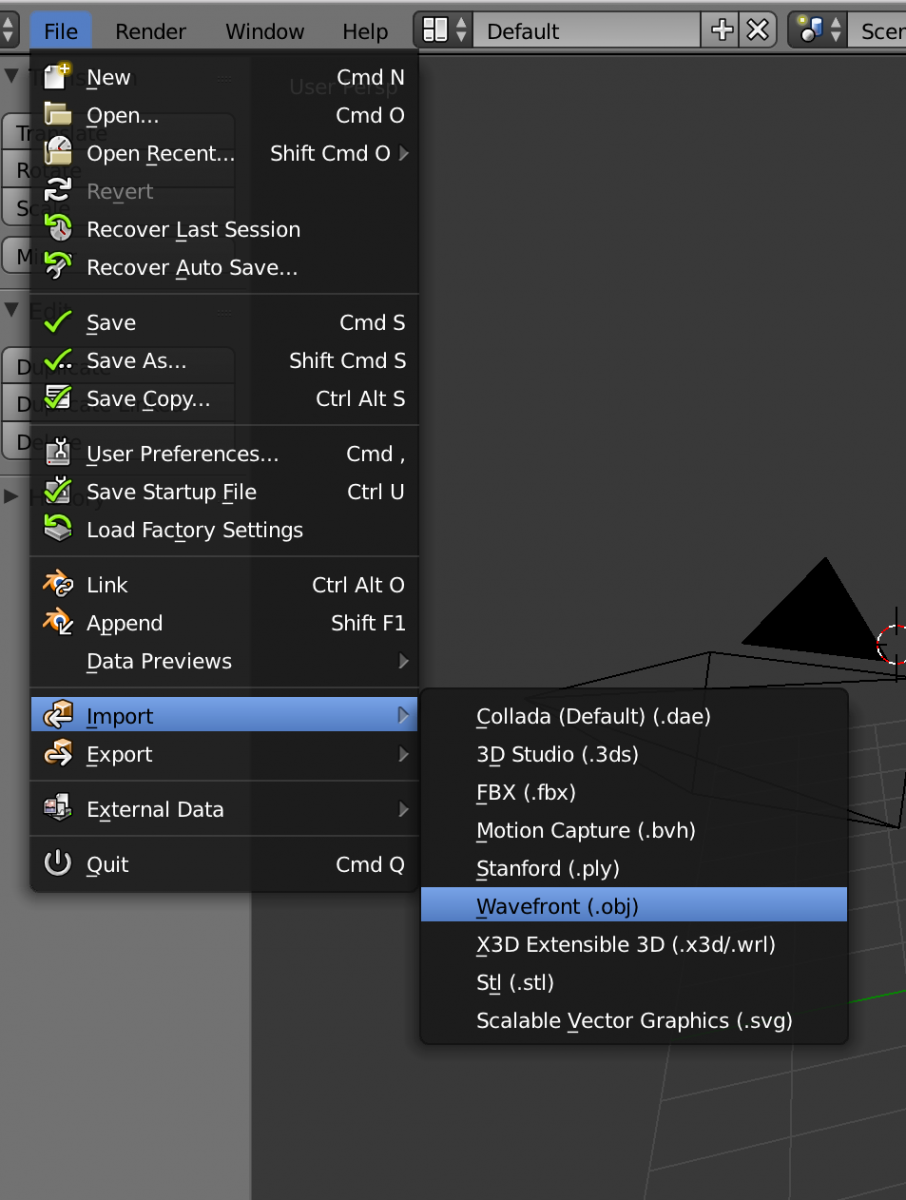
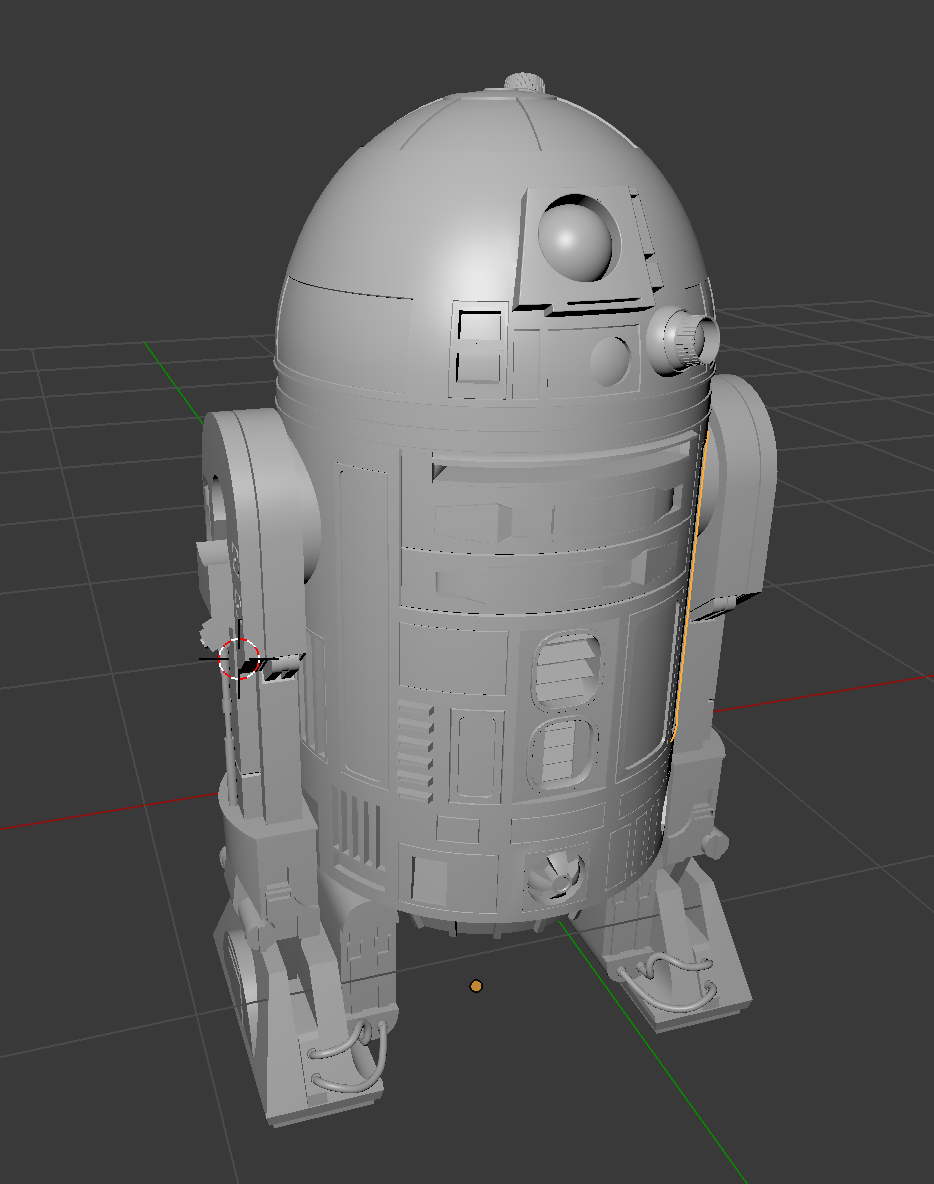
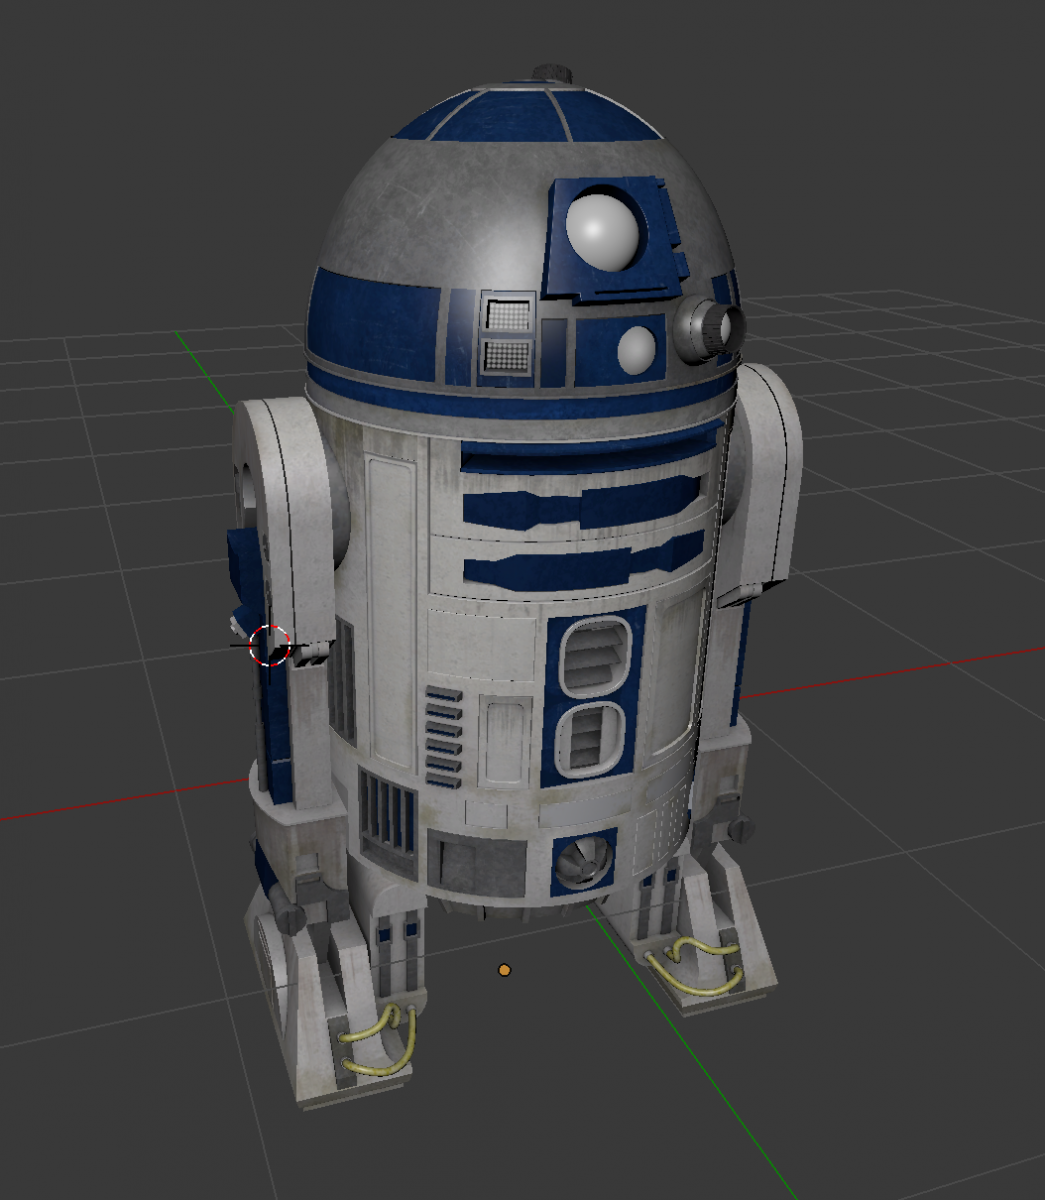
Navigate to the directory where you extraced the models and select the one you want to load. For this short tutorial, I've used the R2D2 model. After the model is loaded you might need to zoom ut a bit to see the real model:

Already looks cool, right? It's a relatively low-poly model, which uses textures to create the renders. We however, need to take a couple of steps to 'fix' the model in Blender. When you import the model, and try to render it for the first time, or use material or texture viewport shading, you won't see a detailled R2D2 model, but just a gray one:
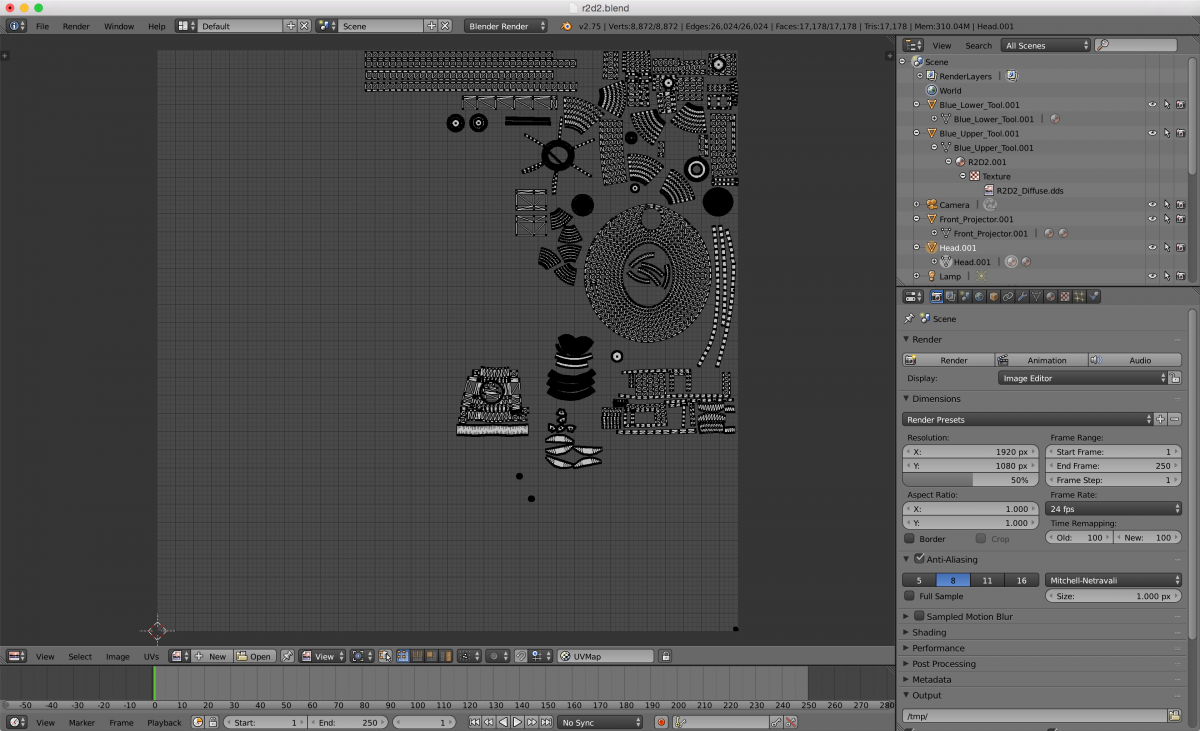
So, there seems to be something wrong with the materials. What the problem is, is that the image files aren't correctly mapped in the obj files (I assume they are in the Element 3D file format, but I don't have After Effects or Element 3D, so can't check). So we need to do some fixing. The advantage is that the UV mapping, luckily, is present for this model:
Now, we can just add the diffuse map, and we should see a correctly rendered model (also make sure you set the lights correctly, or else you'll get a completely black model). Select one of the components of the model (e.g the left foot), and in the material tab you'll see a texture named R2D2.001.
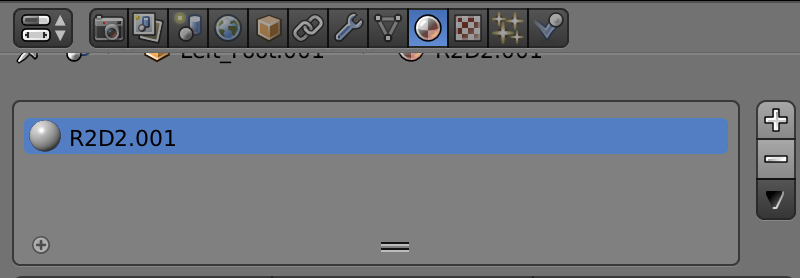
Select that one, and then select the texture tab. Create a new texture, here and assign the R2D2_Diffuse.dds from the Maps directory. This'll result in the following texture definition:
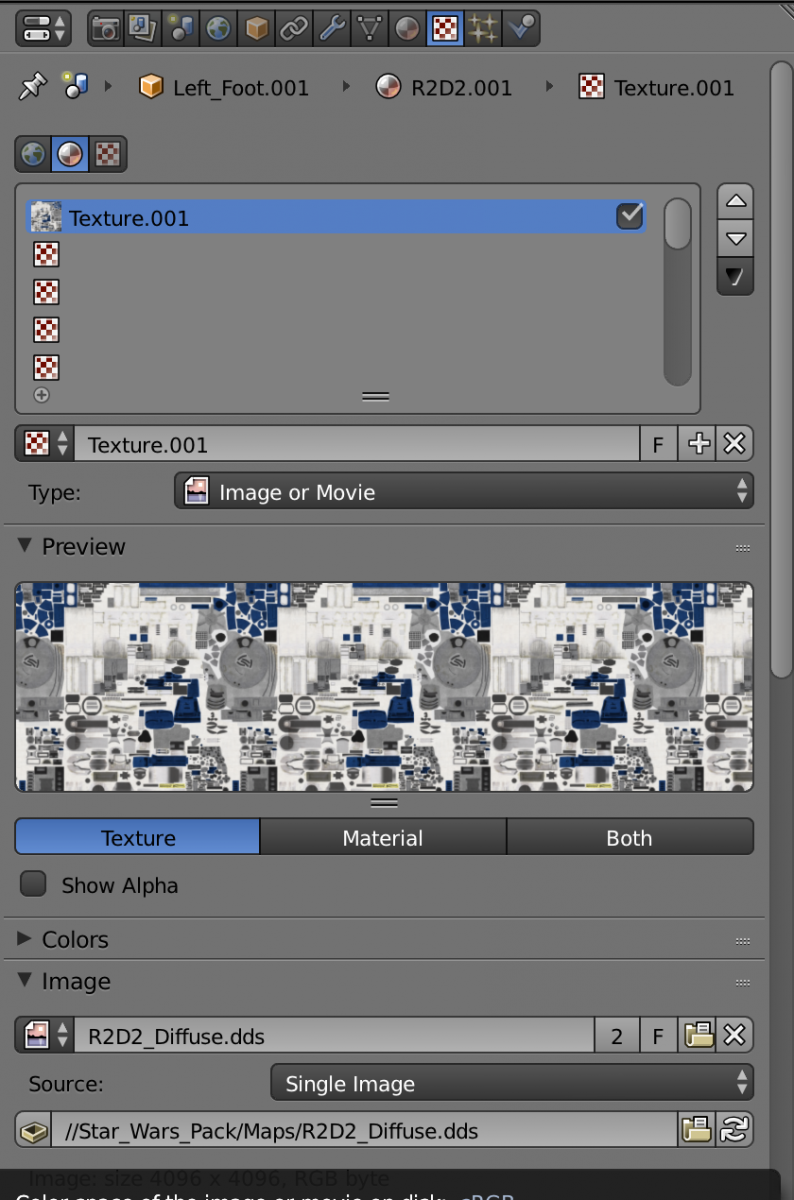
And if you now look at our R2D2 model, you'll see that we've got an already nicely rendered model.
Note that the images are very large 23MB per image, but we'll look later at how to shrink those. If you look into the directory you'll notice a couple of other image files:
- R2D2_Diffuse.dds: The diffuse map contains the colors and texture for the various parts of the model. This is what makes the model look like an actual R2D2 when rendered.
- R2D2_Normal.dds: This is a bump map (name is a bit confusing, since it doesn't seem to be a real normal map). When you apply this map, you can add bumps and depth to the model. The gray value define the height of the bump.
- R2D2_Illumination.dds: This map defines the part of the model that emit light in a specific color. This provides R2D2 with it's red sensor and shows some additional parts of the model that output light.
- R2D2_Reflection.dds: This map seems to add some additional detail and color to the model. It doesn't seem to contain actual reflections, but it does provide some better coloring after applying.
- R2D2_Specular.dds: And this maps finally defines the shininess of your model.
And when you apply them, you'll get a model that looks something like this (quick render, without any material optimization):
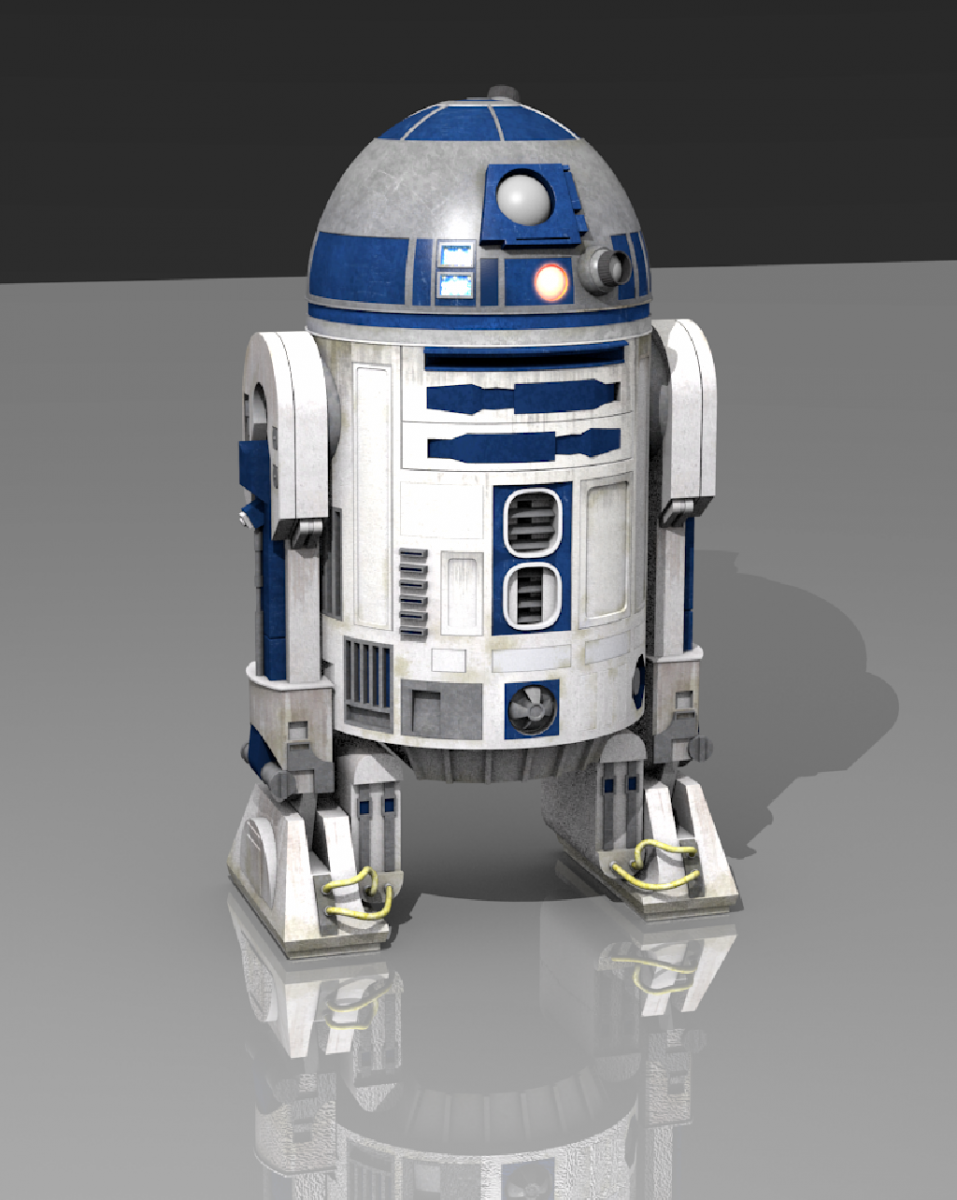
When you apply them all, and render the model, it looks quite nice. But this is +100MB worth of textures, so that might be bit much if we want to use this model and textures from Three.js in our browser. Before we look at the Three.js part,
Creating smaller texture files
First we'll use ImageMagick to convert the dds files to PNGs.
# and to the others as well
$ convert -define png:compression-filter=2 -define png:compression-level=9 -define png:compression-strategy=1 R2D2_Reflection.DDS R2D2_Reflection.png
$ ls -l R2*
-rwxr-xr-x@ 1 jos  staff  22369776 May  4 18:25 R2D2_Diffuse.dds
-rw-r--r--  1 jos  staff  17350674 May  5 13:58 R2D2_Diffuse.png
-rwxr-xr-x@ 1 jos  staff  22369776 May  4 18:25 R2D2_Illumination.DDS
-rw-r--r--  1 jos  staff    327877 May  5 13:24 R2D2_Illumination.png
-rwxr-xr-x@ 1 jos  staff  22369776 May  4 18:25 R2D2_Normal.DDS
-rw-r--r--  1 jos  staff  14249444 May  5 14:00 R2D2_Normal.png
-rwxr-xr-x@ 1 jos  staff  22369776 May  4 18:25 R2D2_Reflection.DDS
-rw-r--r--  1 jos  staff  13336562 May  5 13:57 R2D2_Reflection.png
-rwxr-xr-x@ 1 jos  staff  22369776 May  4 18:25 R2D2_Specular.DDS
-rw-r--r--  1 jos  staff  18223665 May  5 14:00 R2D2_Specular.png
As you can see, some of the images shrink a lot, other a whole lot less. The main reason they take up so much space is because the images are rather big:
$ identify R2D2_Diffuse.png
R2D2_Diffuse.png PNG 4096x4096 4096x4096+0+0 8-bit sRGB 18.63MB 0.010u 0:00.000
While this is nice, if want to make realistic looking renders, but it is a bit overkill for when we want to render these models using Three.js. So let's also convert them to some smaller texture sizes (1024x1024):
$ for file in R2D2*.png
do
    convert -resize 25% "$file" "$(basename "$file" .png)-small.png"
done

$ ls -l R2*-small.png
-rw-r--r--  1 jos  staff   1771310 May  5 14:07 R2D2_Diffuse-small.png
-rw-r--r--  1 jos  staff     47188 May  5 14:07 R2D2_Illumination-small.png
-rw-r--r--  1 jos  staff   1190588 May  5 14:08 R2D2_Normal-small.png
-rw-r--r--  1 jos  staff   1560293 May  5 14:08 R2D2_Reflection-small.png
-rw-r--r--  1 jos  staff   1650999 May  5 14:08 R2D2_Specular-small.png
Now, that looks a lot nicer. Instead of 110MB of textures, we have +/- 6MB of textures. This of course will affect how our model looks. If we rerender the model using the same settings with these textures instead of the HQ ones, we get the following render:
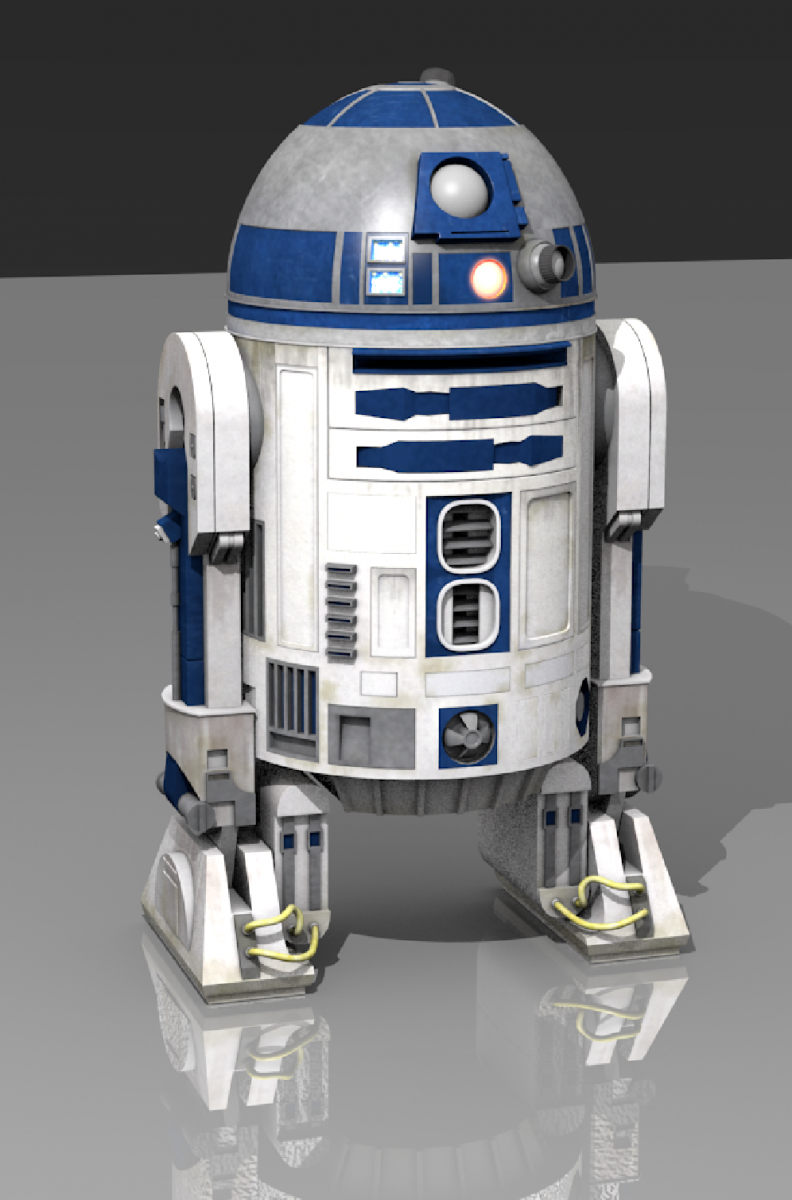
As you can see, still looks very nice. As long as you don't zoom into too much, that is. At this point, we've got a set of smaller textures, so the next
Shrink the model
We were able to drastically scale down the size of the textures. We, however, still have the large model we need to load, which comes in at a 4.5MB. While, not being really that large, it is still rather large. To solve this we can reduce the number of vertices, which will also make rendering quicker, or compress the obj file. While testing with the original number of vertices, there didn't seem to be any stuttering or other issues, so let's keep the number of vertices as they are. The easiest way to make the download quicker is by just enabling gzip support on your server:
# for example the normal and gzipped sizes:
-rwxr-xr-x    1 jos  staff   4513121 May  4 18:25 R2D2_Standing.obj
-rwxr-xr-x    1 jos  staff    987858 May  4 18:25 R2D2_Standing.obj.gz
If you don't want to do that, you might look into some of the javascript based gunzip libraries to decompress a gzipped file yourself. So to limit the size, we'll just assume we have a webserver which returns gzipped data.
Running in Three.js
Now what do you need to do, to get this running in Three.js. First off you can find a simple running example here: Three.js rendering of R2D2. You can use the mouse controls to orbit around R2D2.
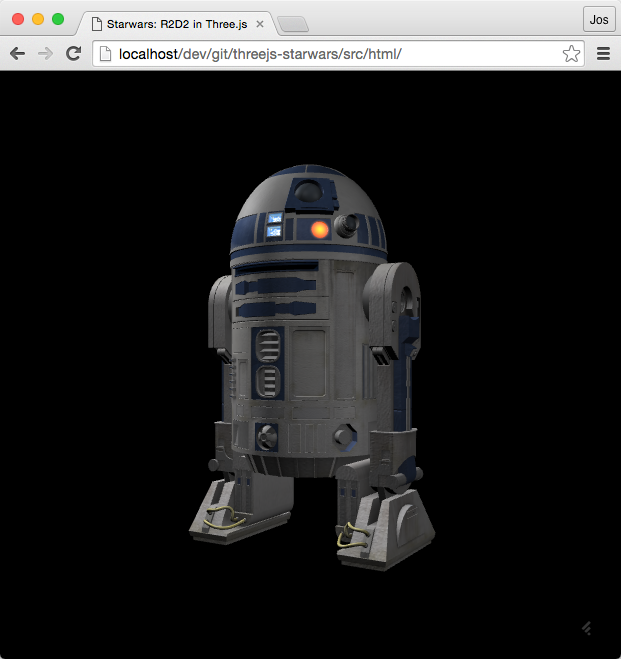
Since you can see the complete sources in the example, I won't show the complete sources, but only the interesting parts: how to load the model, setup the lights, and move the head around a bit.
Loading the model
The first thing we need to do is load the model. Three.js already provides an importer for obj files, so we'll just use that one. Let's first look at the code:
var obj;
var head;
var frontP;

function loadModel() {
     var textLoader = new THREE.TextureLoader();

     var diffuseTexture = textLoader.load("../resources/R2D2_Diffuse-Reflection-Combined-small.png");
     var bumpTexture = textLoader.load("../resources/R2D2_Normal-small.png");
     var emissiveTexture = textLoader.load("../resources/R2D2_Illumination-small.png");
     var specularTexture = textLoader.load("../resources/R2D2_Specular-small.png");

     var loader = new THREE.OBJLoader();
     loader.load("../resources/R2D2_Standing.obj", function(model) {
         model.children.forEach(function(child) {
             var material = child.material;

             // basic texture
             material.map = diffuseTexture;

             // bumps
             material.bumpMap = bumpTexture;
             material.bumpScale = 0.3;

             // glow
             material.emissive = new THREE.Color(0xffffff);
             material.emissiveMap = emissiveTexture;

             // specular
             material.specularMap = specularTexture;

             // enable shadows
             child.receiveShadow = true;
             child.castShadow = true;


             if (child.name === "Head") head = child;
             if (child.name === "Front_Projector") frontP = child;
         });

         model.scale.x = 0.15;
         model.scale.y = 0.15;
         model.scale.z = 0.15;

         model.position.y = -10;
         obj = model;
         scene.add(obj);
     })
 }
If you've already done some Three.js development, this doesn't look that special. We create a number of textures, and after loading the obj model we assign the textures to all the children (the R2D2 model is divided into separate parts). Note that we also assign the head and the Front_Projector childs to separate objects. We do this so we can animate them later on. The interesting part from this code is in creating the textures. When you use the THREE.OBJLoader you get THREE.MeshPongMaterial materials. This material can be configured for a number of textures, which we use like this:
- map: This is the default texture map. We assign the diffuse map to this material.
- bumpMap: This allows us to define the bumps of our model. In our textures we have the Normal map (which, as we've seen is really a bump map), and we'll assign that one.
- emissiveMap: Three.js also provides an emissive map, so we just assign the provided one here.
- specularMap: And the final map we need to assign is the provided specular map. Three.js provides one for that as well.
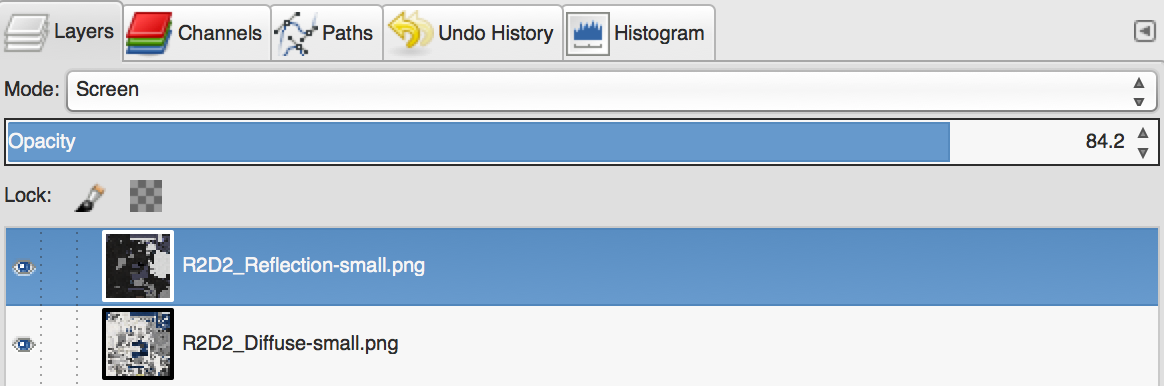
If you've kept track, you might have notices that we didn't mention the provided reflection map (which isn't a real reflection map, as we've seen). Three.js provides an envMap which we could use for reflections, but that serves a bit of a different purpose (cubeMap env example). So what we did was, we combined the provided Diffuse and Reflection map together using Gimp.
The result looks like this:
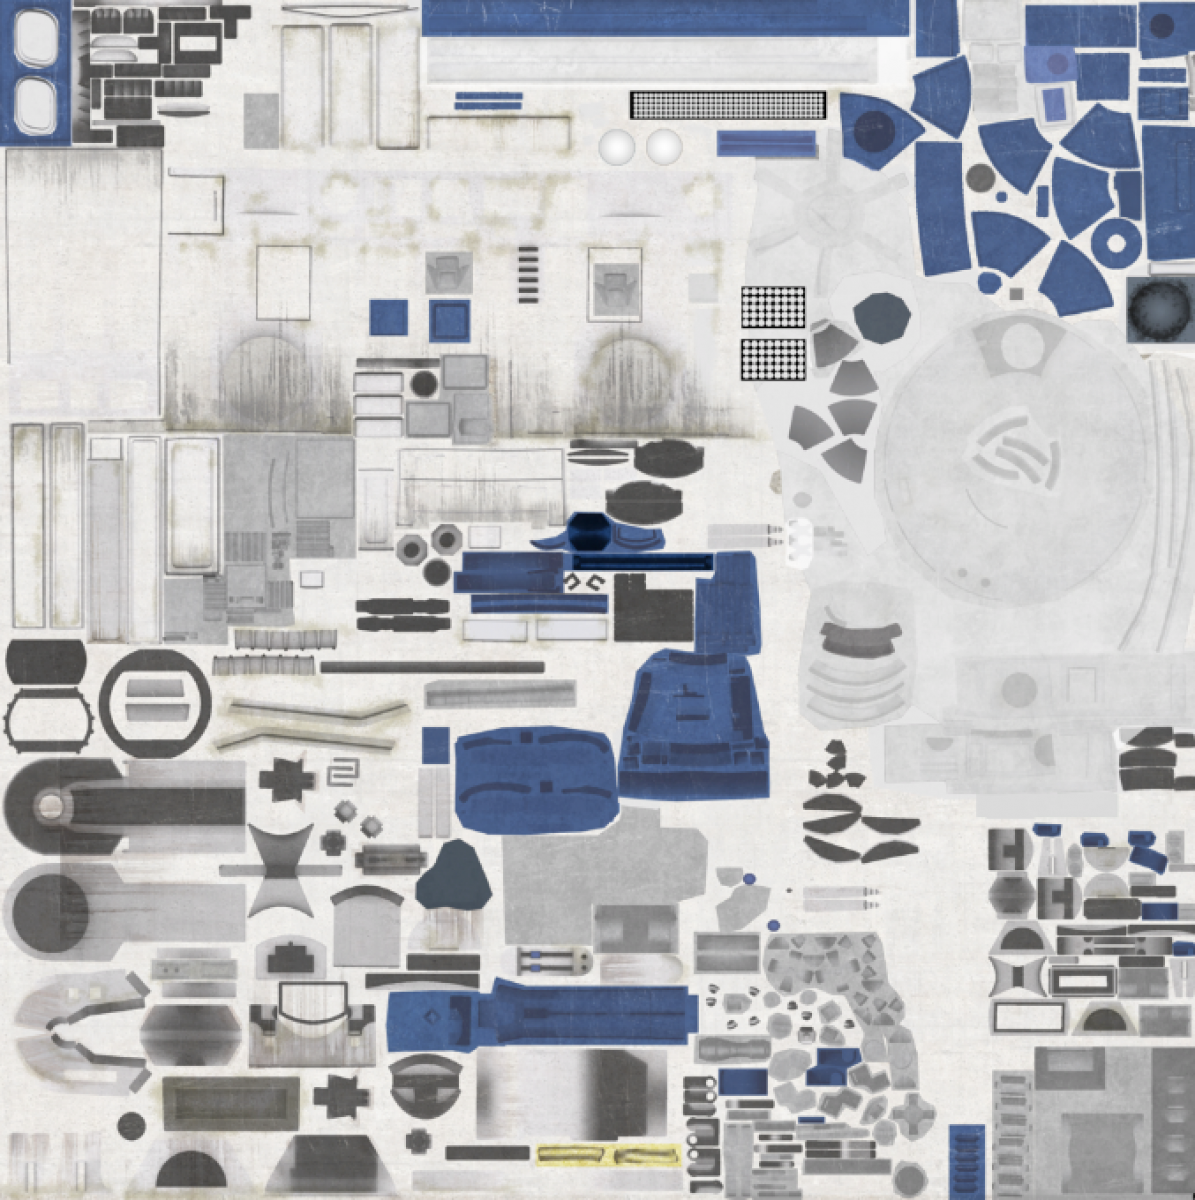
Which was created using the following layer settings:
Setup lights and camera
Now that we've loaded the textures and the model, we can start with the lights. For this simple setup we add three lights. One to the left of the camera, one behind the camera and one to front (basic three light setup: https://en.wikipedia.org/wiki/Three-point_lighting):
// position and point the camera to the center of the scene
camera.position.x = 0;
camera.position.y = 20;
camera.position.z = 30;

// add some lights
var spotLight1 = new THREE.SpotLight(0xffffff, 0.3, 0, Math.PI/4);
spotLight1.position.set(-20, 20, 5);
scene.add(spotLight1);

var spotLight2 = new THREE.SpotLight(0xffffff, 0.6, 0, Math.PI/4);
spotLight2.position.set(-5, 30, 30);
spotLight2.castShadow = true;
// tightly wrap shadow around object
spotLight2.shadow = new THREE.LightShadow( new THREE.PerspectiveCamera( 30, 1, 10, 50 ) );

scene.add(spotLight2);

var spotLight3 = new THREE.SpotLight(0xffffff, 0.3, 0, Math.Pi/4);
spotLight3.position.set(20, 20, -10);
scene.add(spotLight3);
As you can see we allow the second spotlight to cast a shadow, which we wrap tightly around the object, to get nice looking shadows.
Rotate the head a bit`
And the last part is a little bit of animation. We just rotate the two parts that make up the head around by updating the values in our render loop:
var rotMax = 0.5 * Math.PI;
var rotMin = -0.5 * Math.PI;
var direction = 1;

function render() {
    // render using requestAnimationFrame
    requestAnimationFrame(render);
    renderer.render(scene, camera);

    if (head) {
        var rotationY = (0.01 * direction);
        head.rotation.y += rotationY;
        frontP.rotation.y += rotationY;

        if (head.rotation.y > rotMax) direction = -1;
        if (head.rotation.y < rotMin) direction = 1;

    }
}
And that's it.
Conclusions
As you've seen, it isn't that hard to get the models we initially downloaded to render in Three.js. I'm used to first exploring the models and textures using Blender to see what I've got, and look whether the textures are useful, the UV mapping is setup correctly and whether we might need to simply the model.
So basically what we did was:
- Analyse the model and materials in Blender
- Shrink and combine the textures using ImageMagick and Gimp
- Use the simplified textures in Three.js
I'm going to process the other models as well, and post them as demo linked from here.